
www.studioconnections.net.au
|
The Power Good signal (grey wire) appears on pin 8 of the ATX power connector. The +5VSB rail (purple wire) appears on pin 9 of the ATX power connector. The only way of gaining access to the +5VSB rail and the Power Good signal is either on the back of the motherboard or by cutting into the Computer Power Supply wiring harness. I decided to leave the motherboard untouched and instead modify the Computer Power Supply, which needed other modifications anyway. The original unit had plenty of spare peripheral power looms. I had to extend one of these slightly to reach the Blu-ray/DVD drive by cutting the required extra length off a spare loom. I used the remains of the cut off loom as the basis for the Computer Power Connector loom which goes to the Main Chassis. I wired this to a 5-pin Acme female line "microphone" connector (J1), which connects to P1 on the chassis. The spare loom also had an orange wire for the 3.3V rail which this project does not use, so I cut this off completely. (I hope this wasn't a mistake!) I also added two more wires to tap into the Power Good signal (grey wire) and +5VSB rail (purple wire) of the main motherboard power loom. I took no chances here, cutting the original wires completely to add heatshrink to cover and protect the soldered joints.
Other Computer Power Supply ModificationsSince this system is in a wooden cabinet, I added a green/yellow ground wire, attached to the grounding bolt in the Computer Power Supply. This attaches to the Chassis Ground Terminal. To mount the Computer Power Supply in the wooden cabinet, there was enough space to drill a hole in the bottom rear of the unit. Access to this screw is through the fan. A magnetised screwdriver is mandatory! It was necessary to bolt a small bracket to the rear of the unit for the second screw. Lack of space and access to this area, coupled with the delicate operation of screwing into the limited thickness wooden side of the cabinet made this job extra tricky. The down side of these Computer Power Supply modifications is that when (not if) the unit finally fails, the new one must also be modified in the same way. |
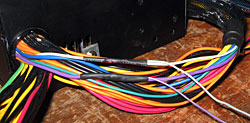 Tapping into the +5V Standy and Power Good
wires
 Modified Computer Power Supply harness
with the additional Mains Ground wire and the
Computer Power Connector (J1)
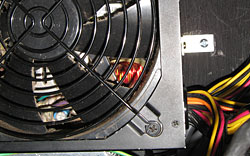 Computer Power Supply rear mounting
bracket and screw
 Computer Power Supply front mounting
screw
|